
Hello guys !
Been really lazy for the past week and was super unproductive due to my semester break ~ * A * Second semester starting on 9th January 2012 ! Can't wait to learn more about fashion design related subjects :D Christmas is just over and everyone is excited bout New Year's celebration ! Talking bout celebrations , I had really good meals for the past few days that I kinda .. err gained weight ? Need to sweat it off soon ~ don't wanna start the new year feeling . . fat D:
Anyways ~ the sewing pattern tutorial that I promised ! I learned pattern making skills from a friend's mother few years back ~ she taught me the basics that I need to know like how to use the sewing machine , basic pattern making like shirts , pants and cheongsam ! I'm really glad that I managed to learn from her and she is a very patient and good teacher to me :) Although I hope that I could stay longer and learn more from her * cough cough *
Like I mentioned in previous post , patterns can be bought online or in stores but it's kinda pricey . Cosmode magazine do provide free patterns and there are books specializes on Cosplay Costumes with lots of patterns for you to trace. However I couldn't fit in the sizes provided .. so I have to draw my own for better fit :D
A reader suggested that I do a tutorial on Sailor Top sewing pattern so here it is ! This is the pattern that I used for my Anarchy Stocking Sailor costume ~ :D

p/s : My first time making a sewing pattern tutorial ~ took me awhile to think how to put everything together ... might be confusing , I'll try to improvise next time ! :)

This is what you need to make your own sewing pattern. Tailor ruler , pen , measuring tape and papers ! I usually use newspaper but for tutorial purposes , I use white paper this time :)

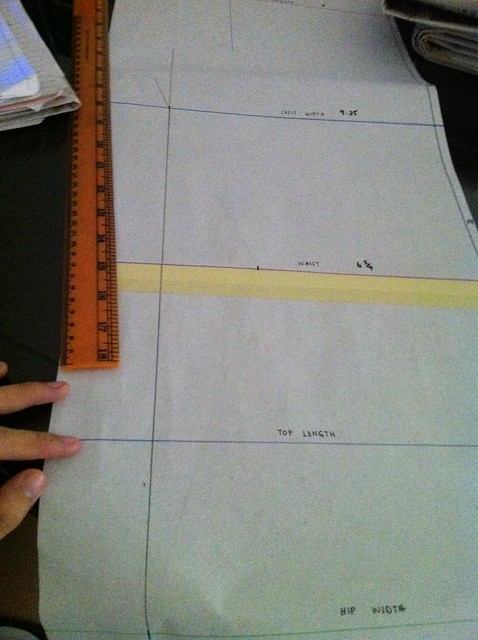
This is the measurement sheet that I use to write down all the measurements needed for the particular costume that I'm drafting.
Note :
X = Your body measurement in INCH
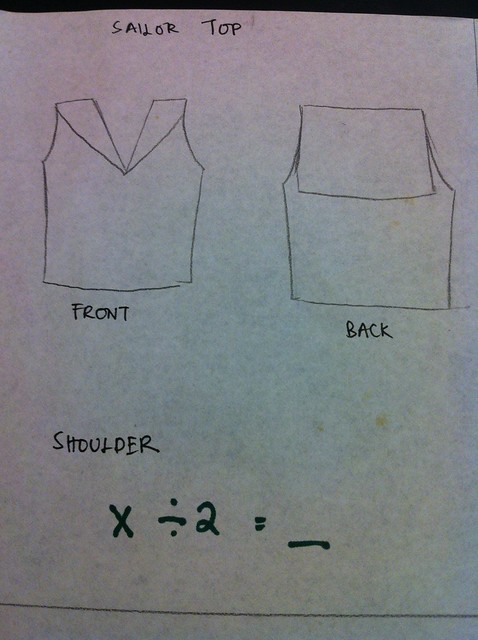
Here I sketch a mini picture of the costume that I plan to make.There's a specific formula that I'm taught to follow ~ and it's kinda accurate so I use it every time I draft a costume :) The first measurement you need is the length of your shoulders.

Next is your armhole .
Note :
( B ) = Back
( F ) = Front
When drafting a pattern , you have to draft the front and the back , so the measurements for front/back has a bit difference.
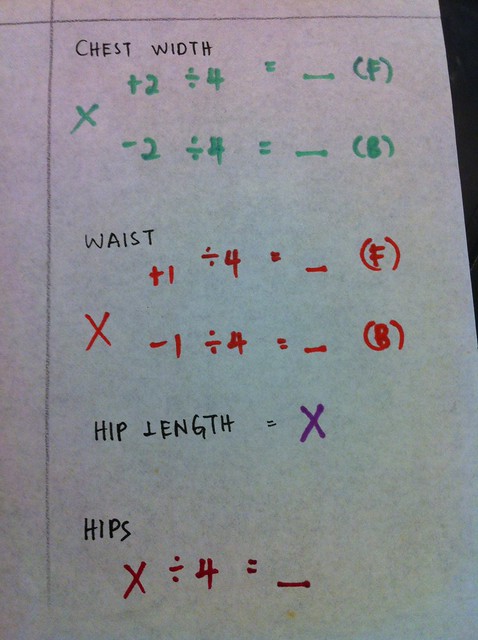
Next up , measure your Chest Circumference , Waist , Hip Length and Hips .
Note :
Hip Length = Length from your waist till your hips
Chest Circumference , not Width.
Chest Circumference , not Width.
p/s : Hello guys , thanks to a reader for pointing this out ~ I'm used to calling it chest width but it's actually Chest Circumference . Don't make a mistake while measuring yeah ~ so sorry for the confusion ! :p
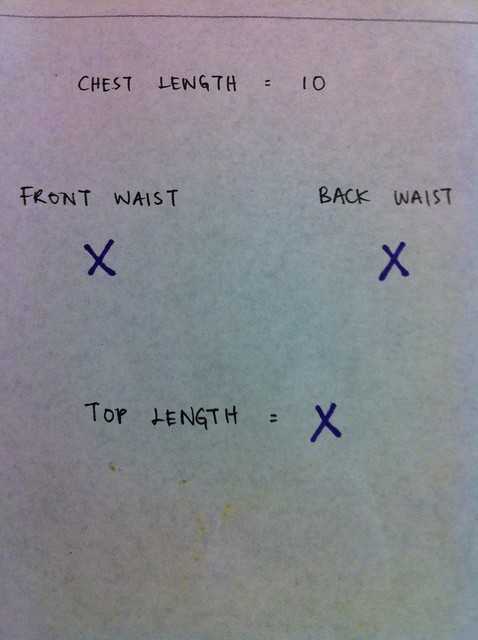
Chest length is pretty standard for everybody , so usually chest length = 10 Inch . Measure your Front Waist / Back Waist and the length of the sailor top.
Note :
Front Waist = The length between your neck and the front part of your waist.
Back Waist = The length between your neck and the back of your waist.
Top length = How long you want your top to be.
Let's get started !
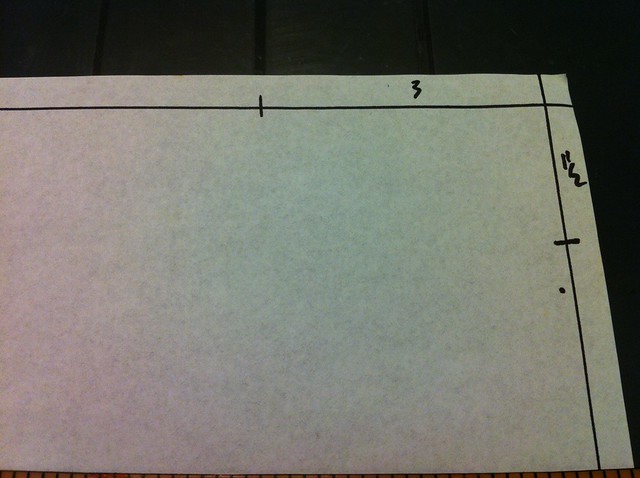
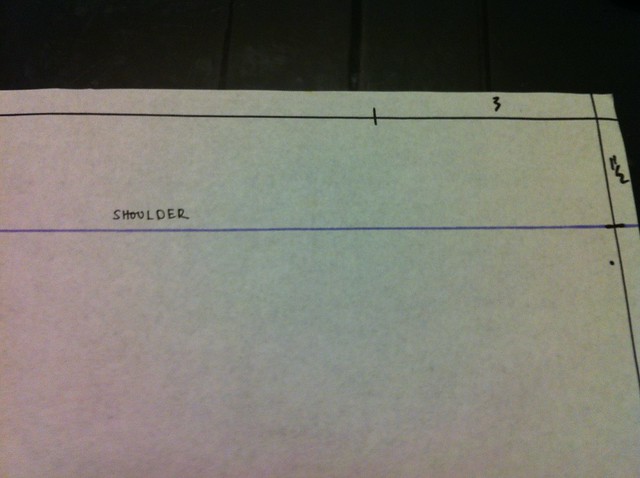
1. Firstly , draw a horizontal and a vertical line at the side of the paper.
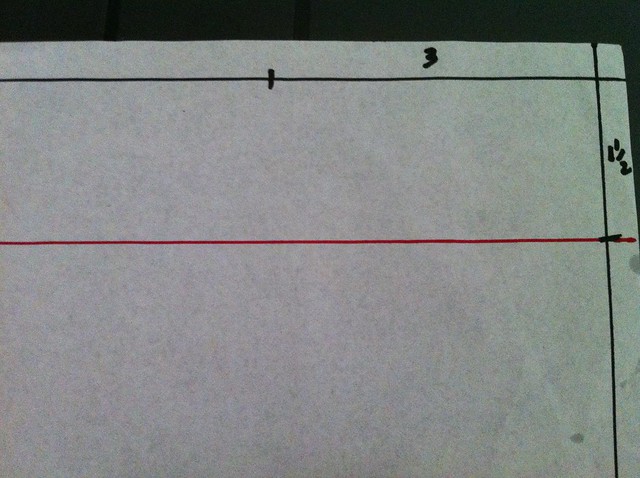
2. Then mark 3 Inch on the horizontal line and 1 1/2 Inch on the vertical line .
Notes :
The 3 Inch and 1 1/2 Inch are kinda like standard measurements for the neck part. It's pretty much almost the same for everyone .

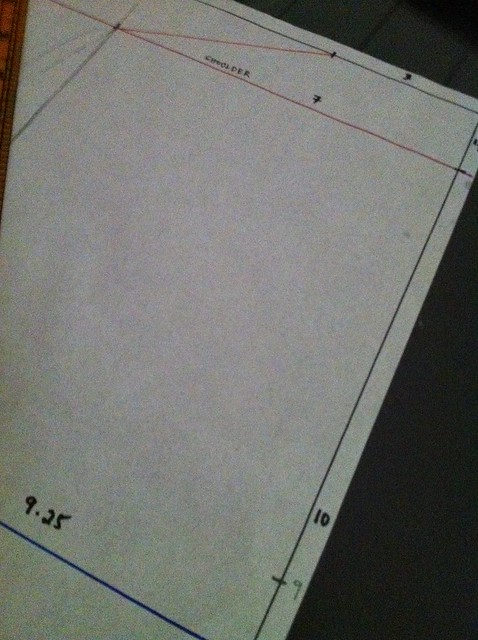
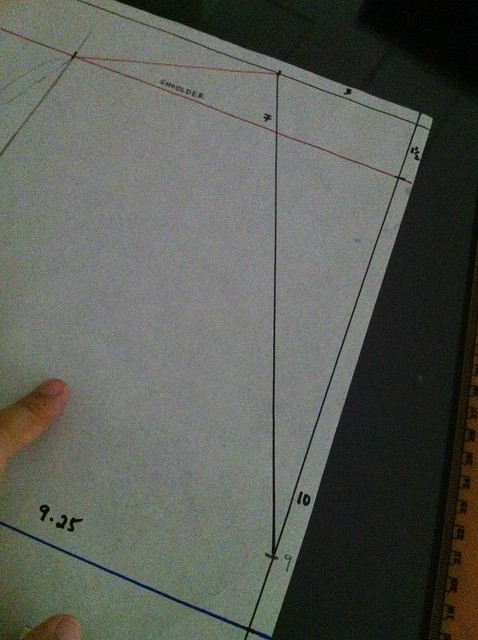
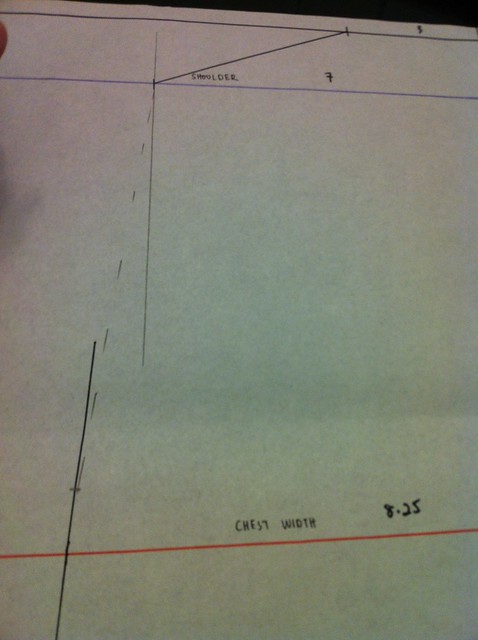
3. Mark your Chest Length = 10 Inch and draw another horizontal line.

4. Mark your Front Waist and draw another horizontal line. In this case , I'm using my measurements as an example , my Front Waist = 17 Inch .
5. The length of my top is 5 Inch down my waist , so I marked 5 Inches below my waist length and drew another horizontal line .
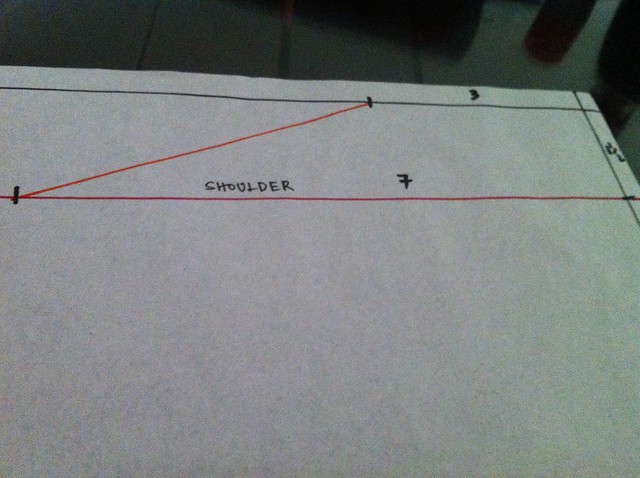
6. My shoulder length is 7 Inch so mark it on the red line. Connect the two points.

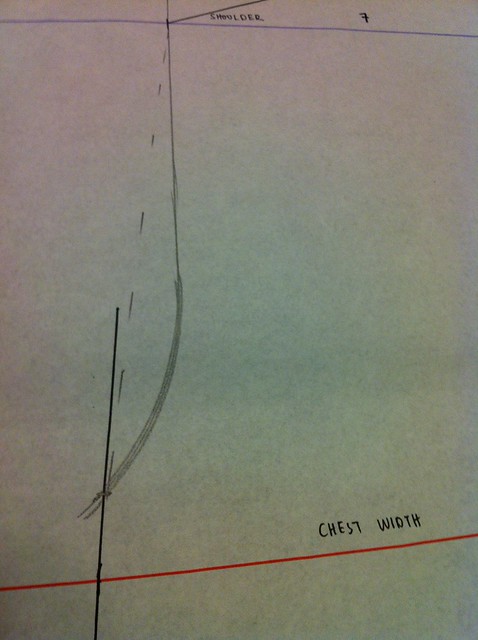
7. Mark your Chest Width .
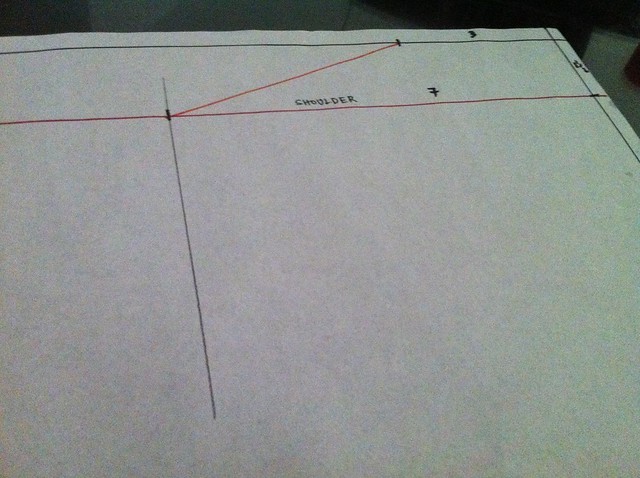
8. Draw a straight line down using pencil. This serves as a guideline when you draw the armhole part later.
9. Connect the points for the Chest Width and Hips Width. I ignore the waist part because mostly sailor top are kinda loose and doesn't follow the waist ? If you want it to be fitter , you can connect the waist point :)
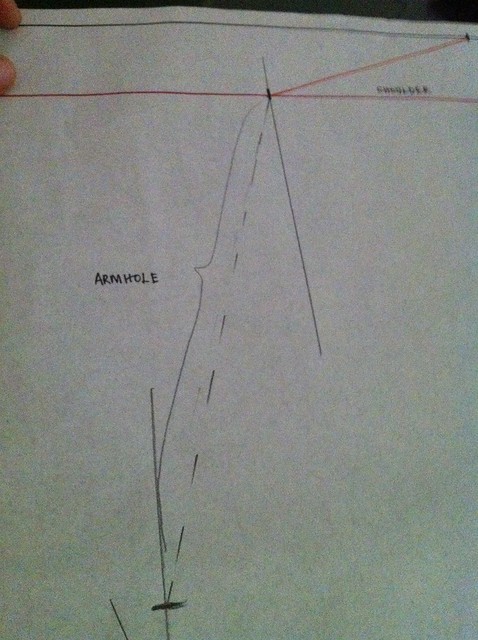
10. Here comes the Armhole part. The dotted line shows the Armhole measurement. Use a ruler and measure from the shoulder point. There you get the point for your armhole ! :D

11. Use the guideline that you drew earlier and draw a curve line , towards your armhole point :)
12. Time for the Collar ! Sailor Collars are kinda deep " V " like so I mark mine 1 Inch above my Chest Width :)
13. Connect the point between your neck and the Collar Point earlier.
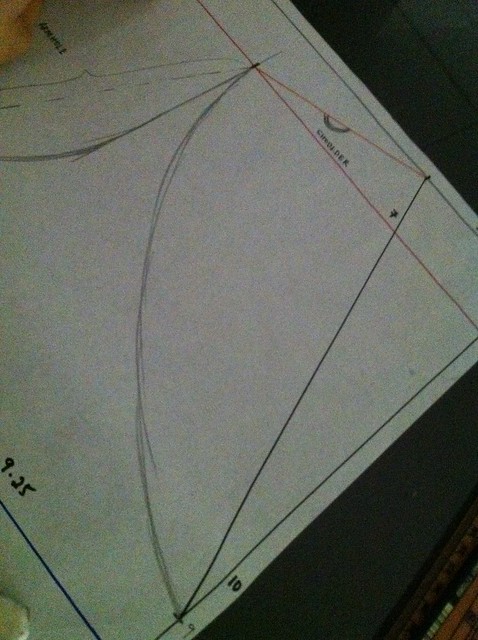
14. Sketch your collar from the Shoulder Point to the Collar Point.

15. Ta-da ! Your Front Pattern for The Sailor Top is done ! 8)
16. Time for the back pattern now ! Repeat the same thing you did for the front :) All the steps remain the same so no worries !


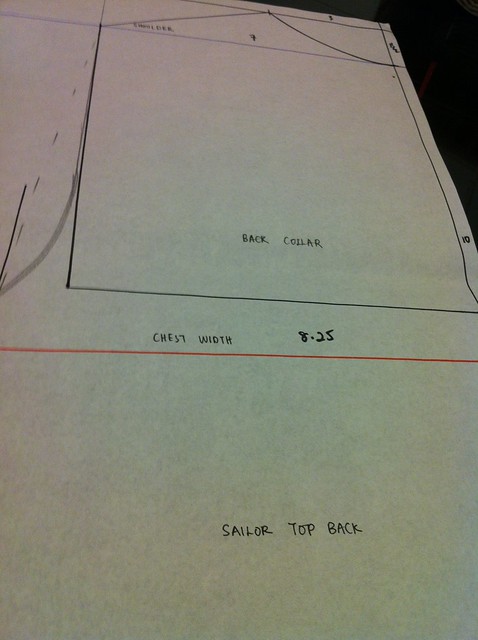
17. For the Back Collar , you can choose how long u want the back collar to be . For me , I prefer 1 Inch above my Chest Width ( Just like my front collar ). Draw a square-like shape and connect to the shoulder point ! :D

18. Back Pattern for Sailor Top also done ! * A *
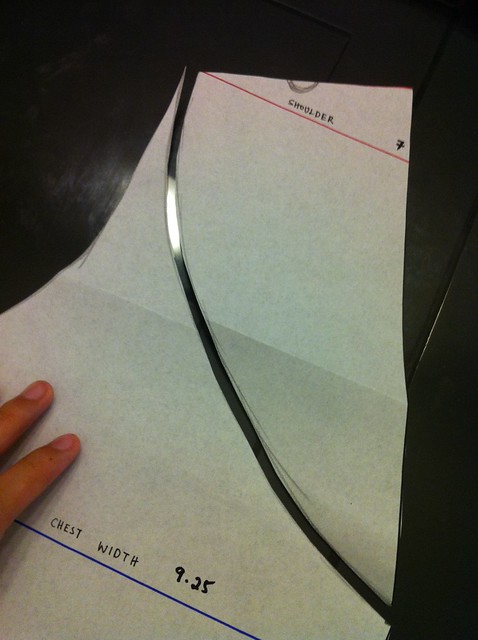
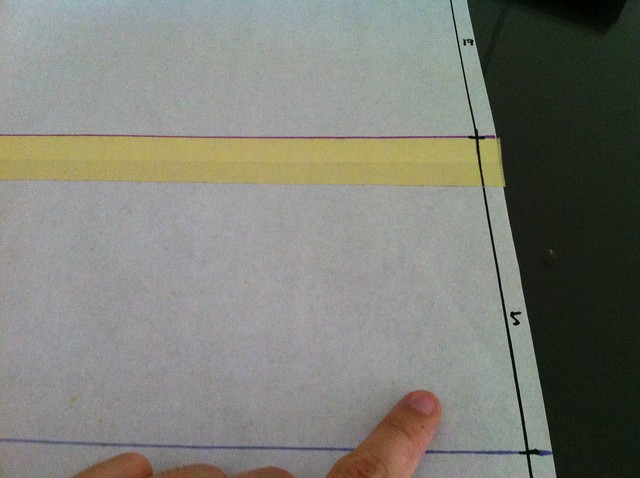
19. This step is for after you traced the pattern on the fabric. To get your Collar pattern , cut out the Front Collar part from the Front pattern.
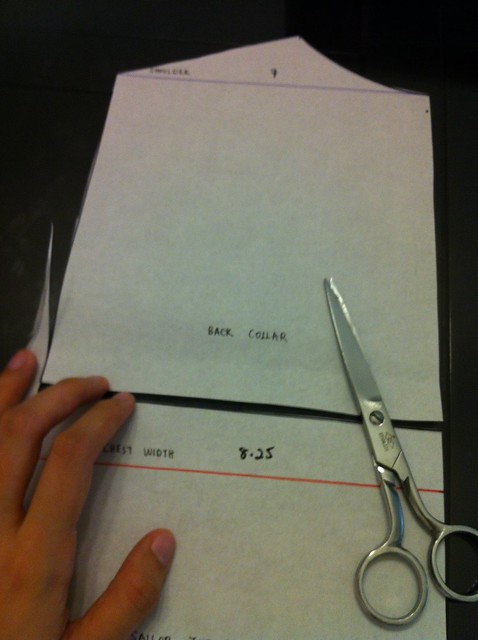
20. Do the same for the Back Collar.

21. Stick the two collar pieces together using masking tape !
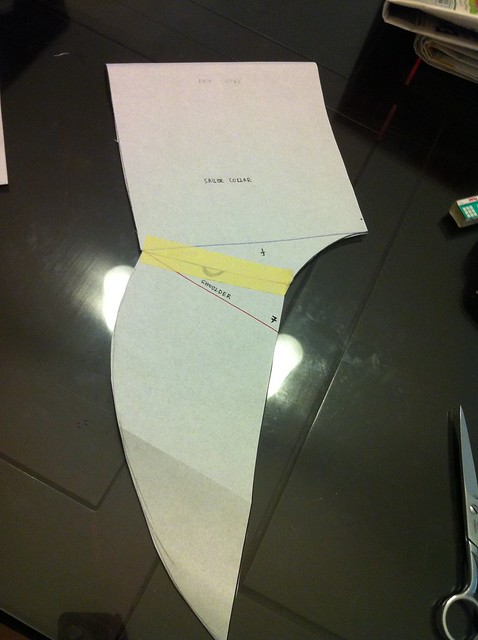
22. Here you go ! That's your Collar pattern for the Sailor Top ! :)

23. This is how it looks when it's folded ! :3
Note :
All these patterns are only half of the actual piece . When you move the pattern onto the fabric , you'll have to fold the fabric into half so you can get two identical pieces :)
There are many methods to draft a Sailor Top Pattern , and this is the method I use when I my cosplay costumes. I'm not good in explaining lol , so if you have any questions , I'll try my best to answer you :D * keeps fingers crossed * Hope this helps !